# Create Your First UHost
## Purchase a UHost
If you have not registered an account yet, please do so first.
**Operation Process**
> - Choose the availability region
> - Choose image, CPU, and memory
> - Configure the network
> - Set related management items
> - Choose a payment method and complete the payment
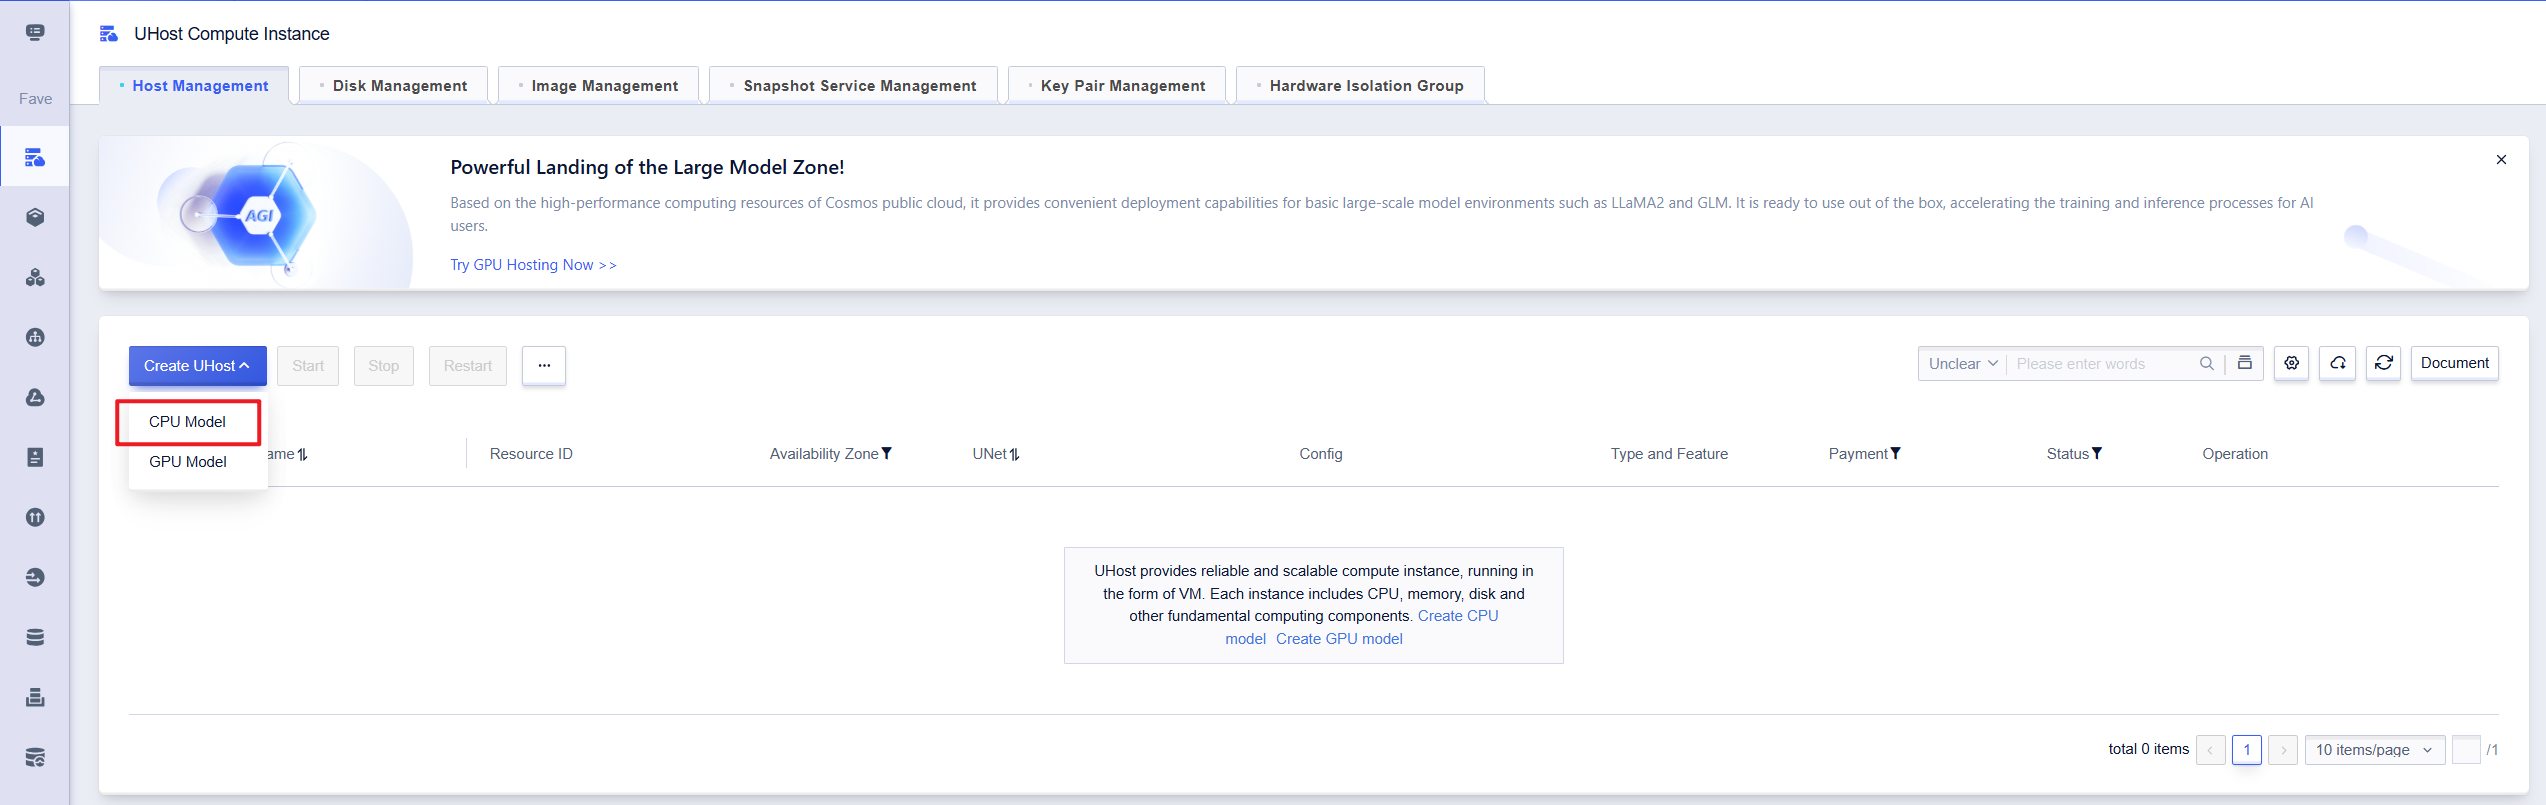
First, log in and head to the [console page](https://console.ucloud-global.com/), choose the UHost product, click on 'Create UHost' to enter the host configuration information page.
### 1. Choose the Available Zone

> There is no internal network communication between different regions.
### 2. Choosing Image, CPU, and Memory
You have two options: basic configuration and custom configuration.
The basic configuration is a pre-packaged combination with a standard image, allowing for quick setup of the system.
The custom configuration allows you to specify the machine type, CPU platform, image, memory, disk size, and options for network enhancements and hot upgrades.
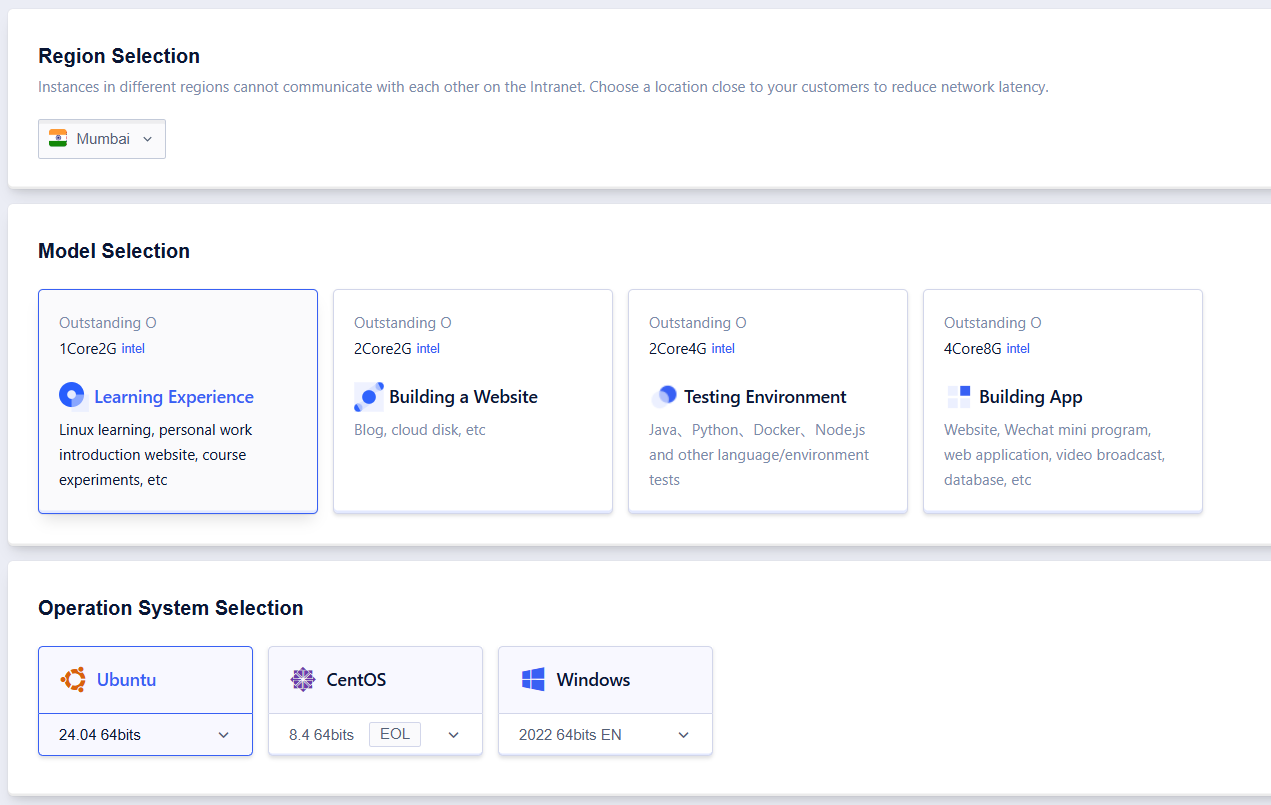
> 1. The default machine type for the basic configuration is General Type N. Only standard image is supported. If you have other requirements, please switch to custom configuration.
> 2. The recommended configuration currently displays four combinations (1 core 1G, 1 core 2G, 2 cores 4G, 4 cores 8G). If you have other requirements, please switch to custom configuration.
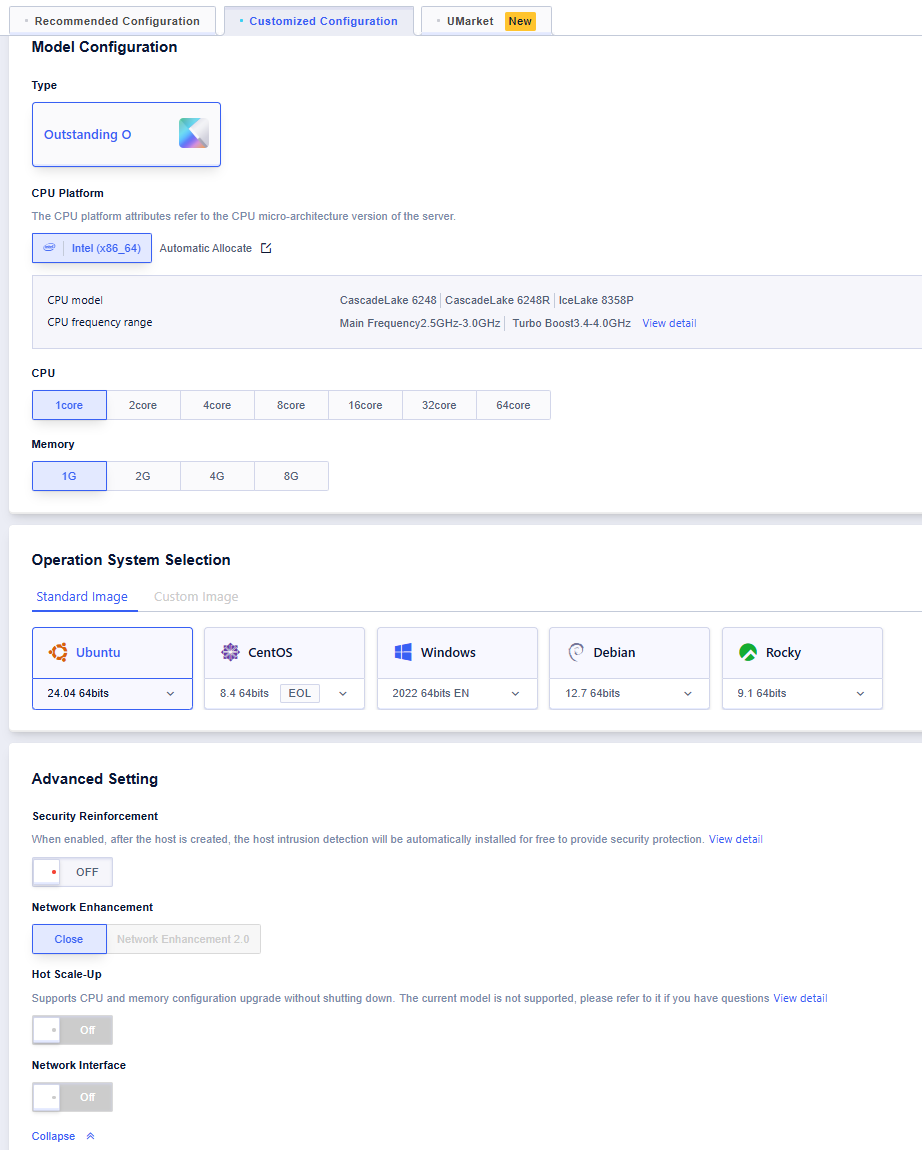
> 1. You can customize the selection of [machine type](/docs/uhost/introduction/uhost/type_new), CPU, memory, [disk type and size](/docs/uhost/introduction/disk).
> 2. You can choose to enable network enhancements and the hot upgrade feature. Some images and machine types may not support these features. For more information, please see [UHost Features](/docs/uhost/introduction/feature/HotPlugFeature).
> 3. The CPU platform refers to the microarchitecture version of the CPU used for the UHost. Each generation of CPU platform primarily upgrades the hardware architecture. For details, please refer to [CPU platforms](/docs/uhost/introduction/uhost/type_new).
### 3. Network Configuration
You can choose between basic and custom network configurations. The basic network will automatically bind an external network Elastic IP and firewall policy. The custom network allows you to specify the VPC, subnet, external network Elastic IP, and firewall settings. The firewall policy initially displays "Web Recommendation" and "Non-Web Recommendation". If you have special needs, you can create new firewall policies.

In basic network mode, the default bandwidth for the external network Elastic IP is 1 Mb, and the firewall policy includes "Web Recommendation" and "Non-Web Recommendation". If the UHost needs to support HTTP or HTTPS services, please choose "Web Recommendation". If the above configuration does not meet your needs, please choose the custom network.
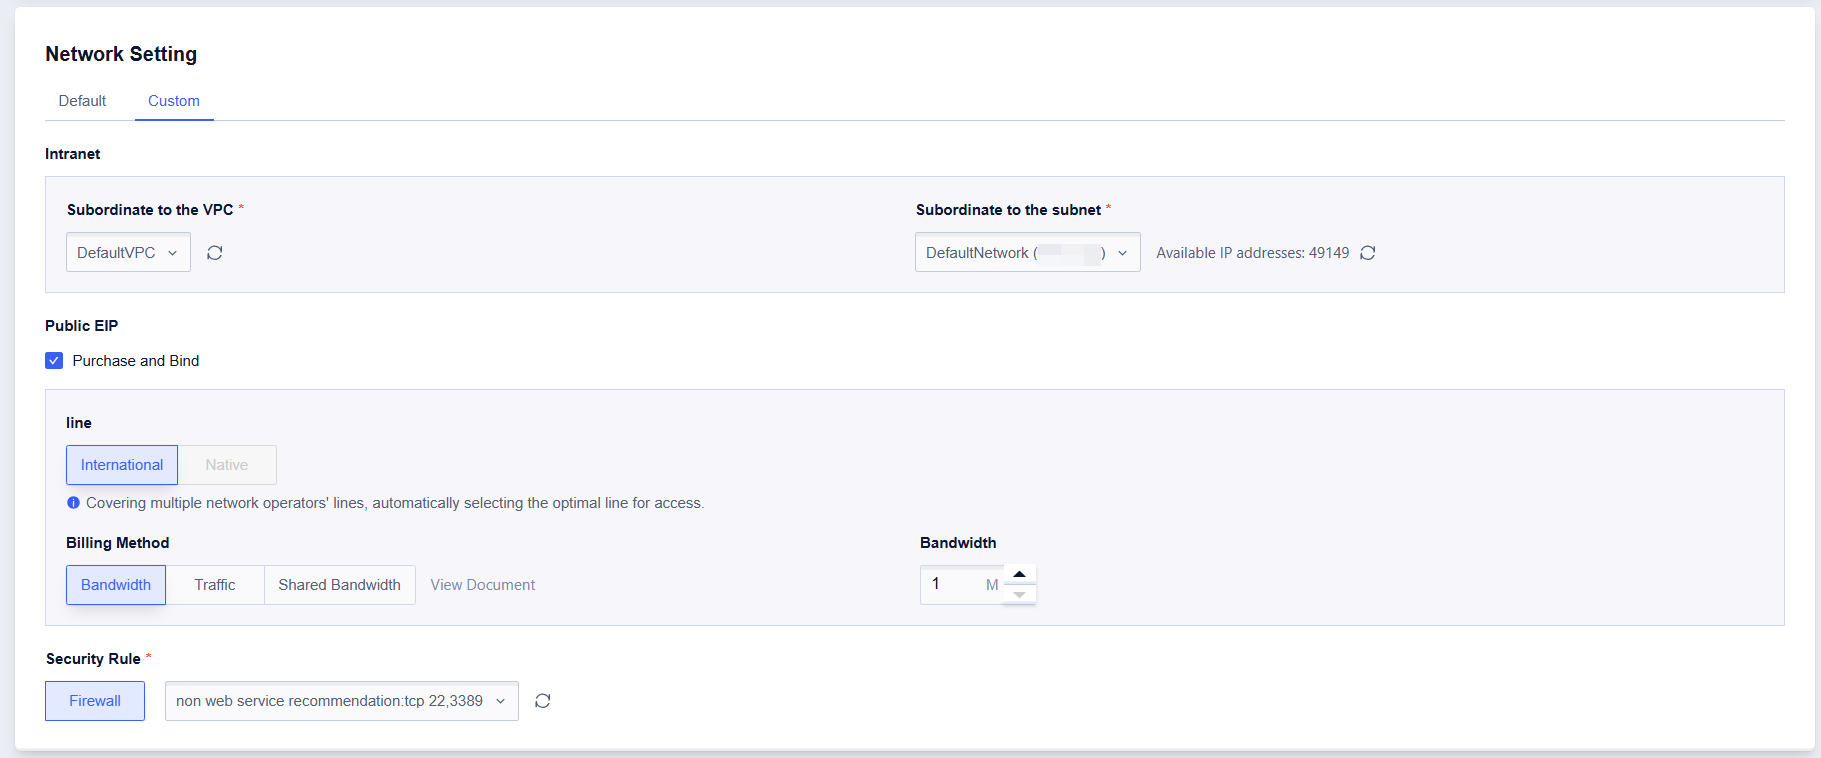
>Note: Bandwidth provides three billing methods: broadband billing, traffic billing, and shared bandwidth.
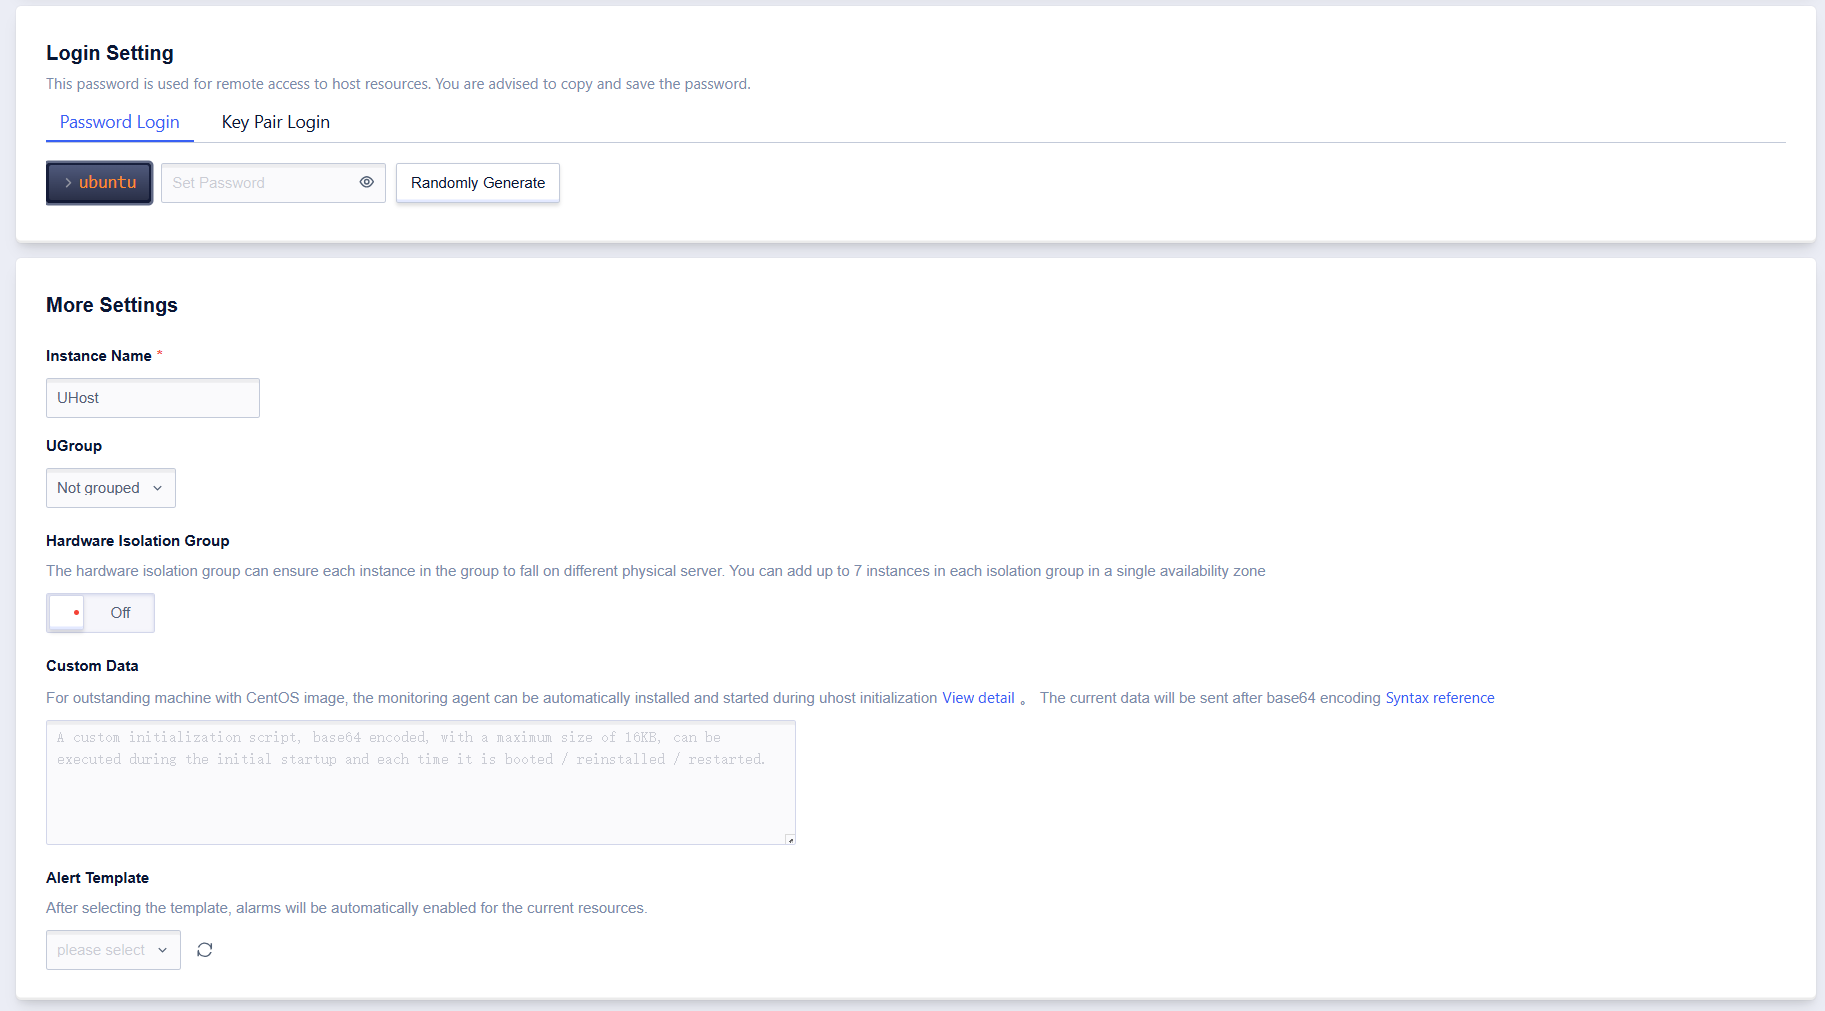
### 4. Administrator Settings
The initial login username is a default value, which varies according to the selected image type and cannot be changed. Set the password, host name, whether to join a business group, and whether to enable a hardware isolation group in sequence. The password can be designed by yourself according to requirements or randomly generated by the system. The isolation group is a logical grouping of UHosts. For more details, see [Hardware Isolation Group](/docs/uhost/guide/isolationgroup).
### 5. Choose a Payment Method and Make Payment
The default payment method is monthly, with the billing period extending to the end of the current month. The system also supports monthly, annual, and hourly payment options. All three are prepaid, meaning the fees for the next billing period will be deducted in advance. Click "Buy Now" to complete the payment. After returning to the console page, you will see the newly purchased UHost in the list.
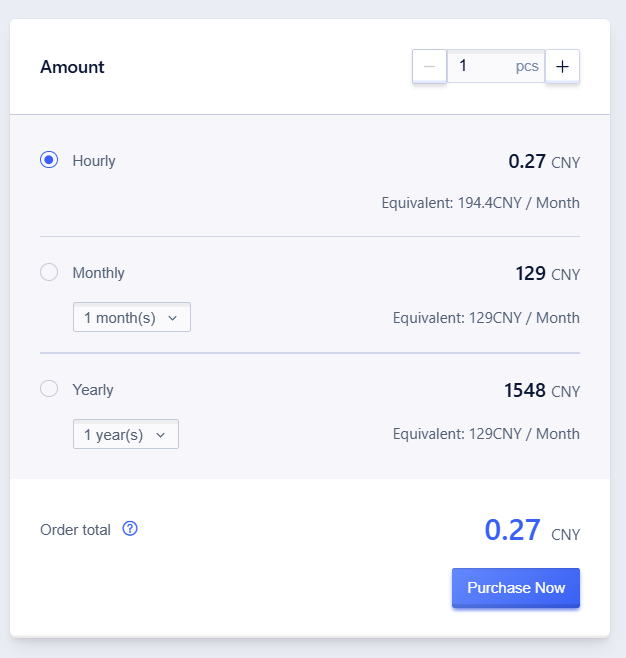
"Monthly Payment" -> "Purchase Until End of Month" means the order payment is made until the end of the current month, and the next billing period will start at 00:00 on the 1st of the following month. For detailed billing information, please refer to [Billing Explanation](/docs/uhost/buy/charge).
## Connect to a UHost
You can connect to a UHost using either Console login or a Third-Party Client login. When using third-party software (such as Xshell, PuTTY, SecureCRT, etc.), ensure that the corresponding firewall ports and external IPs are open.
### 1. Console Login
Click the "Login" button on the page, enter the username and password set during the purchase, and log in via the web.
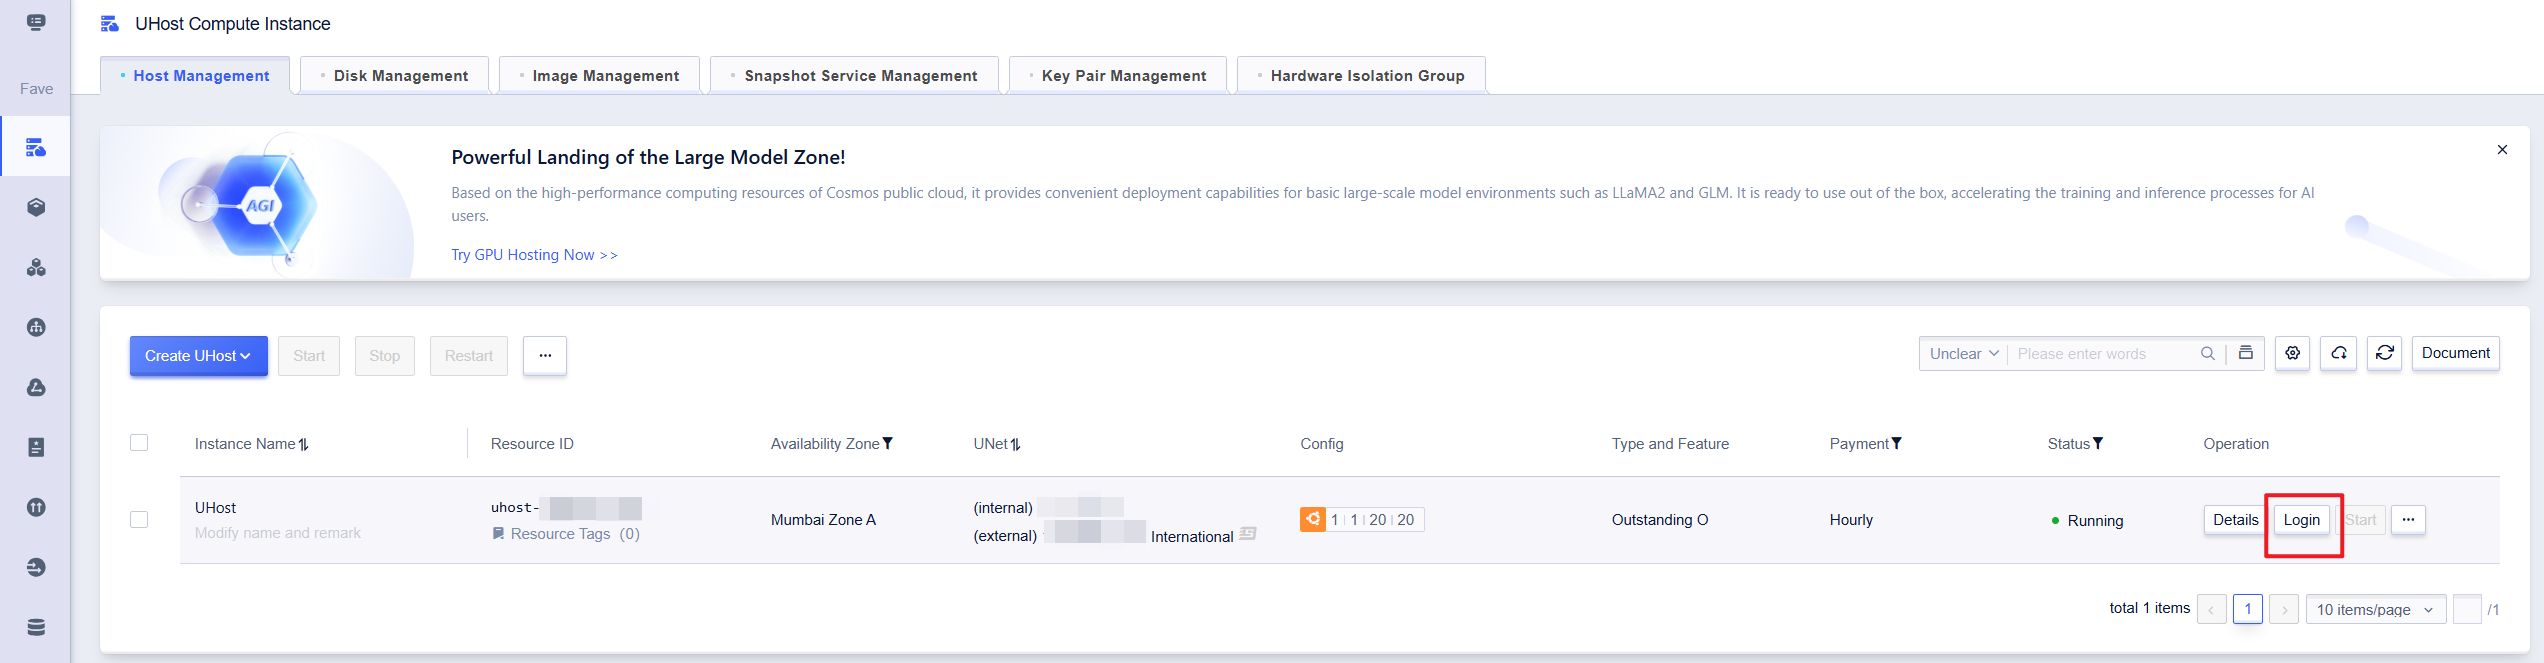
> Note: When the UHost status changes from "Initializing" to "Running", it indicates that the initialization is completed.
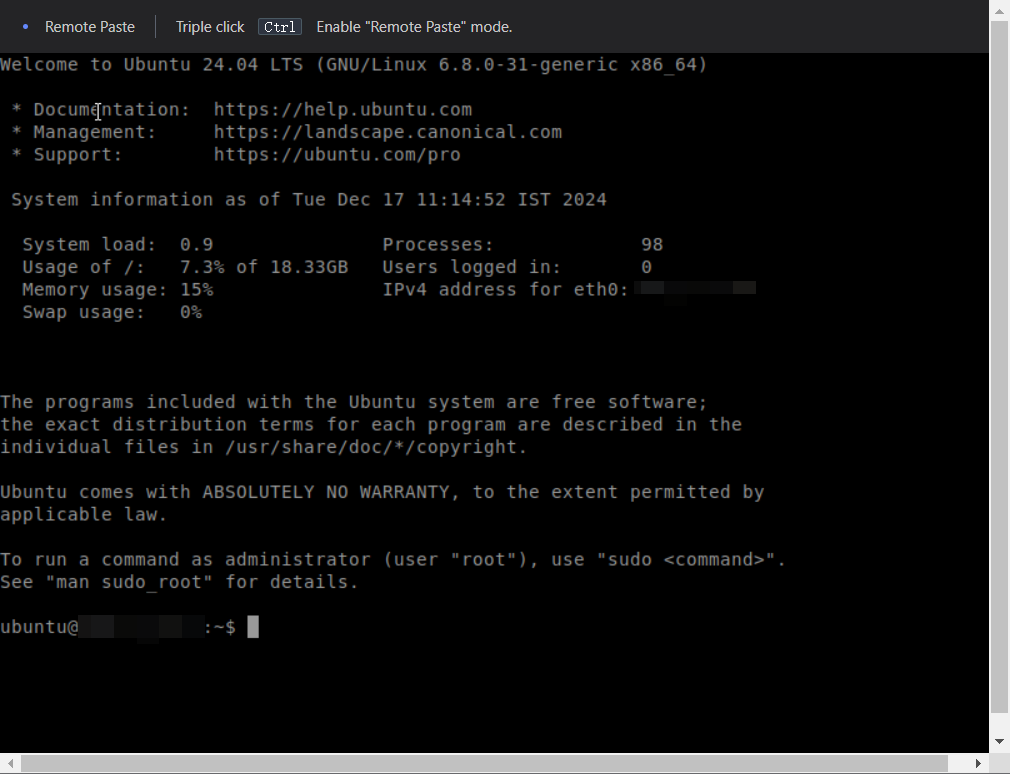
### 2. Third-Party Client Login
If the configured image for the UHost is a Linux environment, you can connect and log in using tools like SecureCRT or XShell.
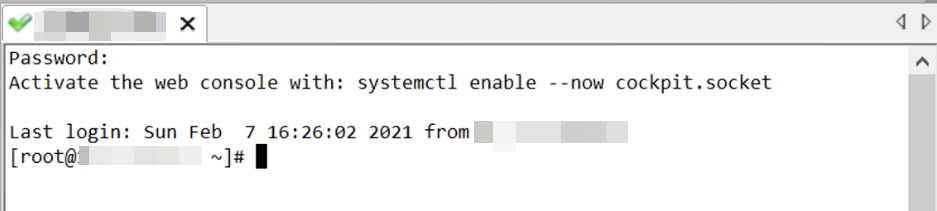
> Note: The UHost login interface may vary depending on the selected image system, but the login steps remain the same.
## Use CLI Commands to Create a UHost
Click the shell icon in the upper-right corner of the console (as shown below), or directly enter the URL to launch the CLI shell. After the window (or page) opens, you need to wait for the backend to allocate a virtual machine, which takes approximately 10–20 seconds.
> When the Cloud Shell starts, a virtual machine (VM) will be automatically created. Different sessions under the same account will share one VM, while VMs of different accounts are isolated from each other to ensure security. You can complete the host creation by entering the following commands. By modifying the parameters of the API interface configuration, you can quickly build hosts as needed. For example, by modifying the count parameter in the equivalent CLI command line, you can batch create more than 10 cloud hosts in CloudShell.
ucloud uhost create --cpu "4" --charge-type "Month" --os-disk-backup-type "NONE" --os-disk-size-gb "20" --os-disk-type "CLOUD_RSSD" --data-disk-backup-type "NONE" --data-disk-size-gb "20" --data-disk-type "CLOUD_RSSD" --gpu "0" --hot-plug "false" --image-id "uimage-x3wyyb" --machine-type "O" --memory-gb "8" --minimal-cpu-platform "Intel/Auto" --name "UHost" --net-capability "Ultra" --create-eip-bandwidth-mb "1" --create-eip-line "Bgp" --create-eip-traffic-mode "Bandwidth" --password "x1\`:/]F'iE}U" --project-id "org-e543cf" --quantity "0" --region "cn-bj2" --firewall-id "1118814" --subnet-id "subnet-idoejvcs" --vpc-id "uvnet-qk4wyw0c" --group "Default" --zone "cn-bj2-02" --count "1"